前端Vue15.总结Vue3组件的通信方式
墨颜丶不管是vue2还是vue3,组件通信方式很重要,不管是项目还是面试都是经常用到的知识点。
比如:vue2组件通信方式
props:可以实现父子组件、子父组件、甚至兄弟组件通信
自定义事件:可以实现子父组件通信
全局事件总线$bus:可以实现任意组件通信
pubsub:发布订阅模式实现任意组件通信
vuex:集中式状态管理容器,实现任意组件通信
ref:父组件获取子组件实例VC,获取子组件的响应式数据以及方法
slot:插槽(默认插槽、具名插槽、作用域插槽)实现父子组件通信…
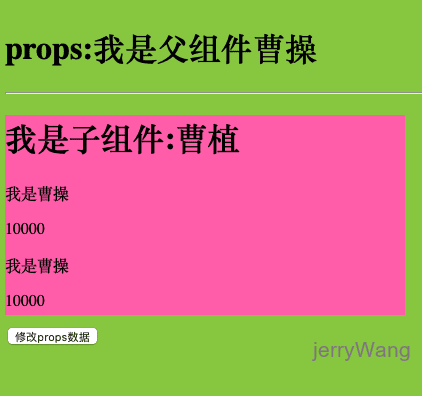
props
props 可以实现父子组件通信,在vue3中我们可以通过defineProps获取父组件传递的数据。且在组件内部不需要引入defineProps方法可以直接使用!
示例
父组件
1
2
3
4
5
6
7
8
9
10
11
12
13
14
15
16
17
18
19
20
21
22
| <template>
<div class="box">
<h1>props:我是父组件曹操</h1>
<hr />
<Child info="我是曹操" :money="money"></Child>
</div>
</template>
<script setup lang="ts">
import Child from "./Child.vue";
import { ref } from "vue";
let money = ref(10000);
</script>
<style scoped>
.box {
width: 100vw;
height: 400px;
background: yellowgreen;
}
</style>
|
子组件./Child.vue
1
2
3
4
5
6
7
8
9
10
11
12
13
14
15
16
17
18
19
20
21
22
23
24
25
26
27
28
29
30
| <template>
<div class="son">
<h1>我是子组件:曹植</h1>
<p>{{ props.info }}</p>
<p>{{ props.money }}</p>
<p>{{ info }}</p>
<p>{{ money }}</p>
<button @click="updateProps">修改props数据</button>
</div>
</template>
<script setup lang="ts">
let props = defineProps(['info', 'money']);
const updateProps = () => {
console.log(props.info)
}
</script>
<style scoped>
.son {
width: 400px;
height: 200px;
background: hotpink;
}
</style>
|

自定义事件
在vue框架中事件分为两种:一种是原生的DOM事件,另外一种自定义事件。
原生DOM事件可以让用户与网页进行交互,比如click、dbclick、change、mouseenter、mouseleave…
自定义事件可以实现子组件给父组件传递数据
原生DOM事件
代码如下:
1
2
3
4
5
6
7
8
9
10
|
<pre @click="handler">
大江东去浪淘尽,千古风流人物
</pre>
##################
const handler = (event)=>{
//event即为事件对象
console.log(event);
}
|
当前代码级给pre标签绑定原生DOM事件点击事件,默认会给事件回调注入event事件对象。当然点击事件想注入多个参数可以按照下图操作。但是切记注入的事件对象务必叫做$event.
1
2
3
4
5
| <div @click="handler1(1,2,3,$event)">我要传递多个参数</div>
const handler1 = (a,b,c,$event)=>{
console.log(a,b,c,$event)
}
|
在vue3框架click、dbclick、change(这类原生DOM事件),不管是在标签、自定义标签上(组件标签)都是原生DOM事件。
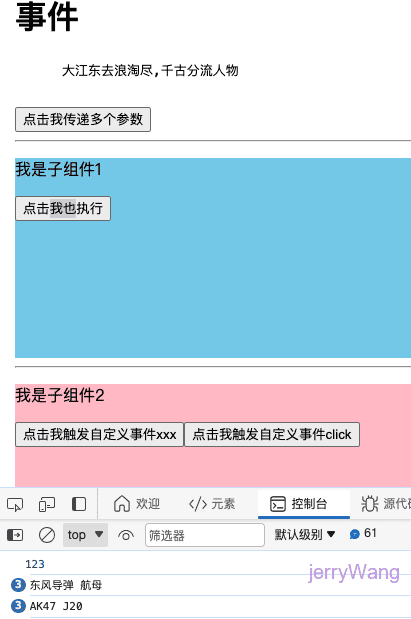
自定义事件
自定义事件可以实现子组件给父组件传递数据.在项目中是比较常用的。
比如在父组件内部给子组件(Event2)绑定一个自定义事件
示例
我们会发现在script标签内部,使用了defineEmits方法,此方法是vue3提供的方法,不需要引入直接使用。defineEmits 方法执行,传递一个数组,数组元素即为将来组件需要触发的自定义事件类型,此方执行会返回一个$emit方法用于触发自定义事件。
当点击按钮的时候,事件回调内部调用$emit方法去触发自定义事件,第一个参数为触发事件类型,第二个、三个、N个参数即为传递给父组件的数据。
父组件
1
2
3
4
5
6
7
8
9
10
11
12
13
14
15
16
17
18
19
20
21
22
23
24
25
26
27
28
29
30
31
32
33
34
35
36
37
38
39
40
41
42
43
44
45
46
47
48
49
50
| <template>
<div>
<h1>事件</h1>
<pre @click="handler">
大江东去浪淘尽,千古分流人物
</pre>
<button @click="handler1(1, 2, 3, $event)">点击我传递多个参数</button>
<hr>
<Event1 @click="handler2"></Event1>
<hr>
<Event2 @xxx="handler3" @click="handler4"></Event2>
</div>
</template>
<script setup lang="ts">
import Event1 from './Event1.vue';
import Event2 from './Event2.vue';
const handler = (event) => {
console.log(event);
}
const handler1 = (a, b, c, $event) => {
console.log(a, b, c, $event)
}
const handler2 = () => {
console.log(123);
}
const handler3 = (param1, param2) => {
console.log(param1, param2);
}
const handler4 = (param1, param2) => {
console.log(param1, param2);
}
</script>
<style scoped></style>
|
./Event1.vue
1
2
3
4
5
6
7
8
9
10
11
12
13
14
15
16
17
18
| <template>
<div class="son">
<p>我是子组件1</p>
<button>点击我也执行</button>
</div>
</template>
<script setup lang="ts">
</script>
<style scoped>
.son{
width: 400px;
height: 200px;
background: skyblue;
}
</style>
|
./Event2.vue
1
2
3
4
5
6
7
8
9
10
11
12
13
14
15
16
17
18
19
20
21
22
23
24
25
26
| <template>
<div class="child">
<p>我是子组件2</p>
<button @click="handler">点击我触发自定义事件xxx</button>
<button @click="$emit('click','AK47','J20')">点击我触发自定义事件click</button>
</div>
</template>
<script setup lang="ts">
let $emit = defineEmits(['xxx','click']);
const handler = () => {
$emit('xxx','东风导弹','航母');
};
</script>
<style scoped>
.child {
width: 400px;
height: 200px;
background: pink;
}
</style>
|
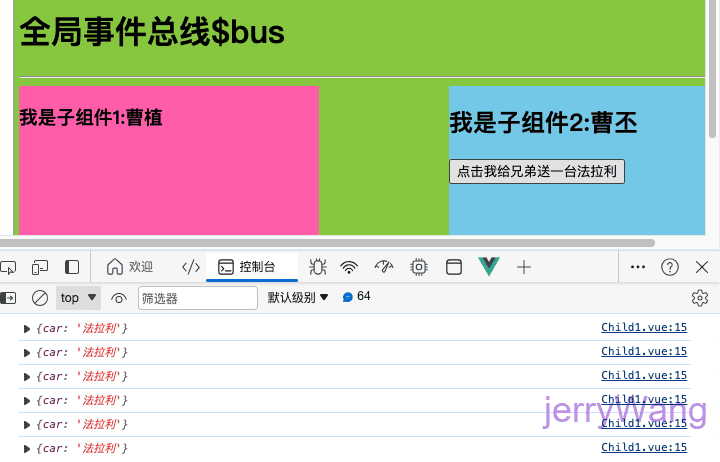
全局事件总线
全局事件总线可以实现任意组件通信,在vue2中可以根据VM与VC关系推出全局事件总线。
但是在vue3中没有Vue构造函数,也就没有Vue.prototype.以及组合式API写法没有this,
那么在Vue3想实现全局事件的总线功能就有点不现实啦,如果想在Vue3中使用全局事件总线功能
可以使用插件mitt实现。
mitt:官网地址:https://www.npmjs.com/package/mitt
1
| npm install --save mitt ## 安装mitt
|
导入mitt,执行mitt()会返回一个对象,对象里有on和emit方法
接收:on绑定事件
传送:emit触发自定义事件
1
2
3
4
|
import mitt from 'mitt';
const $bus = mitt();
export default $bus;
|
示例
导入mitt插件:src/bus/index.ts
1
2
3
4
|
import mitt from 'mitt';
const $bus = mitt();
export default $bus;
|
父组件
1
2
3
4
5
6
7
8
9
10
11
12
13
14
15
16
17
18
19
20
21
22
23
24
25
26
27
28
| <template>
<div class="box">
<h1>全局事件总线$bus</h1>
<hr />
<div class="container">
<Child1></Child1>
<Child2></Child2>
</div>
</div>
</template>
<script setup lang="ts">
import Child1 from "./Child1.vue";
import Child2 from "./Child2.vue";
</script>
<style scoped>
.box {
width: 100vw;
height: 400px;
background: yellowgreen;
}
.container{
display: flex;
justify-content: space-between;
}
</style>
|
./Child1.vue
1
2
3
4
5
6
7
8
9
10
11
12
13
14
15
16
17
18
19
20
21
22
23
24
25
26
| <template>
<div class="child1">
<h3>我是子组件1:曹植</h3>
</div>
</template>
<script setup lang="ts">
import $bus from "../../bus";
import { onMounted } from "vue";
onMounted(() => {
$bus.on("car", (car) => {
console.log(car);
});
});
</script>
<style scoped>
.child1 {
width: 300px;
height: 300px;
background: hotpink;
}
</style>
|
./Child2.vue
1
2
3
4
5
6
7
8
9
10
11
12
13
14
15
16
17
18
19
20
21
22
23
| <template>
<div class="child2">
<h2>我是子组件2:曹丕</h2>
<button @click="handler">点击我给兄弟送一台法拉利</button>
</div>
</template>
<script setup lang="ts">
import $bus from '../../bus';
const handler = () => {
$bus.emit('car', { car: "法拉利" });
}
</script>
<style scoped>
.child2 {
width: 300px;
height: 300px;
background: skyblue;
}
</style>
|
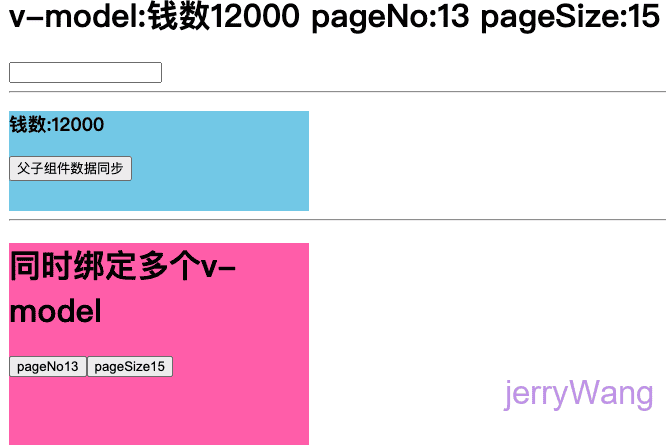
v-model
v-model指令可是收集表单数据(数据双向绑定),除此之外它也可以实现父子组件数据同步。
而v-model实指利用props[modelValue]与自定义事件[update:modelValue]实现的。
下方代码:相当于给组件Child传递一个props(modelValue)与绑定一个自定义事件update:modelValue
实现父子组件数据同步
1
2
3
| <Child v-model="money"></Child>
相当于
<Child :modelValue="money" @update:modelValue="handler"></Child>
|
在vue3中一个组件可以通过使用多个v-model,让父子组件多个数据同步,下方代码相当于给组件Child传递两个props分别是pageNo与pageSize,以及绑定两个自定义事件update:pageNo与update:pageSize实现父子数据同步
1
| <Child1 v-model:pageNo="pageNo" v-model:pageSize="pageSize"></Child1>
|
示例
父组件
1
2
3
4
5
6
7
8
9
10
11
12
13
14
15
16
17
18
19
20
21
22
23
24
25
26
27
28
29
30
31
32
33
34
35
36
37
38
39
40
41
42
| <template>
<div>
<h1>v-model:钱数{{ money }} pageNo:{{ pageNo }} pageSize:{{ pageSize }}</h1>
<input type="text" v-model="info" />
<hr />
<Child v-model="money"></Child>
<hr />
<Child1 v-model:pageNo="pageNo" v-model:pageSize="pageSize"></Child1>
</div>
</template>
<script setup lang="ts">
import Child from "./Child.vue";
import Child1 from "./Child1.vue";
import { ref } from "vue";
let info = ref("");
let money = ref(10000);
let pageNo = ref(1);
let pageSize = ref(3);
</script>
<style scoped></style>
|
./Child.vue
1
2
3
4
5
6
7
8
9
10
11
12
13
14
15
16
17
18
19
20
21
22
23
24
25
| <template>
<div class="child">
<h3>钱数:{{ modelValue }}</h3>
<button @click="handler">父子组件数据同步</button>
</div>
</template>
<script setup lang="ts">
let props = defineProps(["modelValue"]);
let $emit = defineEmits(["update:modelValue"]);
const handler = () => {
$emit("update:modelValue", props.modelValue + 1000);
};
</script>
<style scoped>
.child {
width: 300px;
height: 100px;
background: skyblue;
}
</style>
|
./Child1.vue
1
2
3
4
5
6
7
8
9
10
11
12
13
14
15
16
17
18
19
20
21
22
23
24
25
26
| <template>
<div class="child2">
<h1>同时绑定多个v-model</h1>
<button @click="handler">pageNo{{ pageNo }}</button>
<button @click="$emit('update:pageSize', pageSize + 4)">
pageSize{{ pageSize }}
</button>
</div>
</template>
<script setup lang="ts">
let props = defineProps(["pageNo", "pageSize"]);
let $emit = defineEmits(["update:pageNo", "update:pageSize"]);
const handler = () => {
$emit("update:pageNo", props.pageNo + 3);
};
</script>
<style scoped>
.child2 {
width: 300px;
height: 300px;
background: hotpink;
}
</style>
|
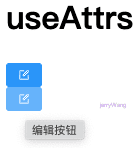
useAttrs
在Vue3中可以利用useAttrs方法获取组件的属性与事件(包含:原生DOM事件或者自定义事件),次函数功能类似于Vue2框架中$attrs属性与$listeners方法 。
比如:在父组件内部使用一个二次封装的el-button
1
| <HintButton type="primary" size="small" :icon="Edit" title="编辑按钮" @click="handler" @xxx="handler"></HintButton>
|
子组件内部可以通过useAttrs方法获取组件属性与事件.因此你也发现了,它类似于props,可以接受父组件传递过来的属性与属性值。需要注意如果defineProps接受了某一个属性,useAttrs方法返回的对象身上就没有相应属性与属性值。
1
2
3
4
5
6
7
8
9
10
11
12
13
| <template>
<div :title="$attrs.title">
<el-button :="$attrs"></el-button>
</div>
</template>
<script setup lang="ts">
import { useAttrs } from "vue";
let $attrs = useAttrs();
</script>
|
1
2
3
4
5
6
7
8
| console.log($attrs);
icon: {name: 'Edit', __file: 'edit.vue', render: ƒ}
onClick: () => { alert(12306); }
onXxx: () => { alert(12306); }
size: "small"
title: "编辑按钮"
type: "primary"
|
示例
比如二次封装el-button添加button按钮title文字提示
1
2
3
4
5
6
7
8
9
10
11
12
13
14
15
16
17
18
19
20
21
22
23
24
25
26
27
28
29
| <template>
<div>
<h1>useAttrs</h1>
<el-button type="primary" size="small" :icon="Edit"></el-button>
<HintButton type="primary" size="small" :icon="Edit" title="编辑按钮" @click="handler" @xxx="handler"></HintButton>
</div>
</template>
<script setup lang="ts">
import {
Check,
Delete,
Edit,
Message,
Search,
Star,
} from "@element-plus/icons-vue";
import HintButton from "./HintButton.vue";
const handler = ()=>{
alert(12306);
}
</script>
<style scoped>
</style>
|
./HintButton.vue
1
2
3
4
5
6
7
8
9
10
11
12
13
14
15
16
17
18
19
20
21
| <template>
<div :title="$attrs.title">
<el-button :="$attrs"></el-button>
</div>
</template>
<script setup lang="ts">
import { useAttrs } from "vue";
let $attrs = useAttrs();
console.log($attrs);
</script>
<style scoped></style>
|
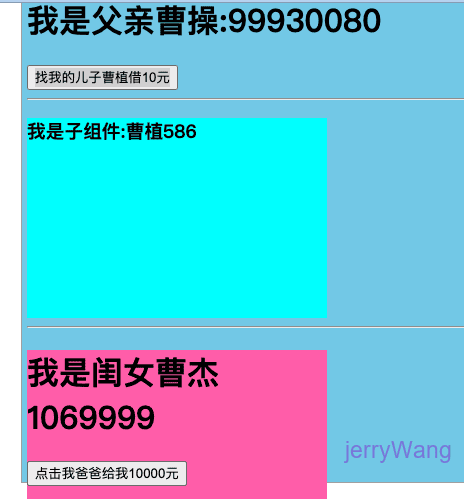
ref与$parent
提及到ref可能会想到它可以获取元素的DOM或者获取子组件实例的VC。既然可以在父组件内部通过ref获取子组件实例VC,那么子组件内部的方法与响应式数据父组件可以使用的。
比如:在爸爸像儿子借钱,女儿像爸爸借钱
父亲曹操
1
2
3
4
5
6
7
8
9
10
11
12
13
14
15
16
17
18
19
20
21
22
23
24
25
26
27
28
29
30
31
32
33
34
35
36
37
38
39
40
41
42
| <template>
<div class="box">
<h1>我是父亲曹操:{{ money }}</h1>
<button @click="handler">找我的儿子曹植借10元</button>
<hr />
<Son ref="son"></Son>
<hr />
<Dau></Dau>
</div>
</template>
<script setup lang="ts">
import Son from "./Son.vue";
import Dau from "./Daughter.vue";
import { ref } from "vue";
let money = ref(100000000);
let son = ref();
const handler = () => {
money.value += 10;
son.value.money -= 10;
son.value.fly();
};
defineExpose({
money,
});
</script>
<style scoped>
.box {
width: 100vw;
height: 500px;
background: skyblue;
}
</style>
|
儿子曹植./Son.vue
1
2
3
4
5
6
7
8
9
10
11
12
13
14
15
16
17
18
19
20
21
22
23
24
25
26
27
28
| <template>
<div class="son">
<h3>我是子组件:曹植{{money}}</h3>
</div>
</template>
<script setup lang="ts">
import {ref} from 'vue';
let money = ref(666);
const fly = ()=>{
console.log('我可以飞');
}
defineExpose({
money,
fly
})
</script>
<style scoped>
.son {
width: 300px;
height: 200px;
background: cyan;
}
</style>
|
女儿./Daughter.vue
1
2
3
4
5
6
7
8
9
10
11
12
13
14
15
16
17
18
19
20
21
22
23
24
25
| <template>
<div class="dau">
<h1>我是闺女曹杰{{ money }}</h1>
<button @click="handler($parent)">点击我爸爸给我10000元</button>
</div>
</template>
<script setup lang="ts">
import { ref } from "vue";
let money = ref(999999);
const handler = ($parent) => {
money.value += 10000;
$parent.money -= 10000;
};
</script>
<style scoped>
.dau {
width: 300px;
height: 300px;
background: hotpink;
}
</style>
|
但是需要注意,如果想让父组件获取子组件的数据或者方法需要通过defineExpose对外暴露,因为vue3中组件内部的数据对外“关闭的”,外部不能访问
$parent可以获取某一个组件的父组件实例VC,因此可以使用父组件内部的数据与方法。必须子组件内部拥有一个按钮点击时候获取父组件实例,当然父组件的数据与方法需要通过defineExpose方法对外暴露
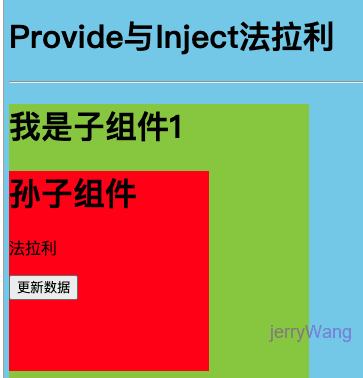
provide与inject
provide[提供]
inject[注入]
vue3提供两个方法provide与inject,可以实现隔辈组件传递参数
组件组件提供数据:
provide方法用于提供数据,此方法执需要传递两个参数,分别提供数据的key与提供数据value
1
2
3
4
| <script setup lang="ts">
import {provide} from 'vue'
provide('token','admin_token');
</script>
|
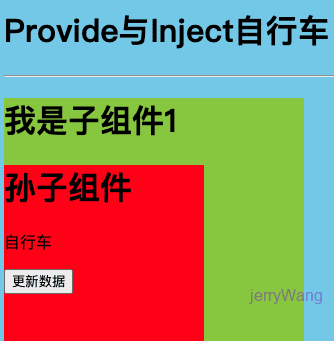
后代组件可以通过inject方法获取数据,通过key获取存储的数值
1
2
3
4
| <script setup lang="ts">
import {inject} from 'vue'
let token = inject('token');
</script>
|
示例
爷爷给孙子传递数据
爷爷组件
1
2
3
4
5
6
7
8
9
10
11
12
13
14
15
16
17
18
19
20
21
22
23
24
25
26
| <template>
<div class="box">
<h1>Provide与Inject{{car}}</h1>
<hr />
<Child></Child>
</div>
</template>
<script setup lang="ts">
import Child from "./Child.vue";
import { ref, provide } from "vue";
let car = ref("法拉利");
provide("TOKEN", car);
</script>
<style scoped>
.box {
width: 100vw;
height: 600px;
background: skyblue;
}
</style>
|
儿子组件./Child.vue
1
2
3
4
5
6
7
8
9
10
11
12
13
14
15
16
17
18
| <template>
<div class="child">
<h1>我是子组件1</h1>
<Child></Child>
</div>
</template>
<script setup lang="ts">
import Child from './GrandChild.vue';
</script>
<style scoped>
.child{
width: 300px;
height: 400px;
background: yellowgreen;
}
</style>
|
孙子组件./GrandChild.vue
1
2
3
4
5
6
7
8
9
10
11
12
13
14
15
16
17
18
19
20
21
22
23
24
25
| <template>
<div class="child1">
<h1>孙子组件</h1>
<p>{{car}}</p>
<button @click="updateCar">更新数据</button>
</div>
</template>
<script setup lang="ts">
import {inject} from 'vue';
let car = inject('TOKEN');
const updateCar = ()=>{
car.value = '自行车';
}
</script>
<style scoped>
.child1 {
width: 200px;
height: 200px;
background: red;
}
</style>
|
pinia
pinia官网:https://pinia.web3doc.top/
pinia也是集中式管理状态容器,类似于vuex。但是核心概念没有mutation、modules,使用方式参照官网
安装pinia
1
| npm install pinia --save
|
引入pinia
创建src/store/index.ts文件
1
2
3
4
5
6
|
import { createPinia } from 'pinia';
let store = createPinia();
export default store;
|
编辑src/main.ts
1
2
3
|
import store from './store'
app.use(store)
|
父组件
1
2
3
4
5
6
7
8
9
10
11
12
13
14
15
16
17
18
19
20
21
22
23
24
25
26
27
28
29
30
31
| <template>
<div class="box">
<h1>pinia</h1>
<div class="container">
<Child></Child>
<Child1></Child1>
</div>
</div>
</template>
<script setup lang="ts">
import Child from "./Child.vue";
import Child1 from "./Child1.vue";
</script>
<style scoped>
.box {
width: 600px;
height: 400px;
background: skyblue;
}
.container{
display: flex;
}
</style>
|
选择式API写法
src/store/modules/info.ts
1
2
3
4
5
6
7
8
9
10
11
12
13
14
15
16
17
18
19
20
21
22
23
24
25
26
27
28
29
30
|
import { defineStore } from "pinia";
let useInfoStore = defineStore("info", {
state: () => {
return {
count: 99,
arr: [1, 2, 3, 4, 5, 6, 7, 8, 9, 10]
}
},
actions: {
updateNum(a: number, b: number) {
this.count += a;
}
},
getters: {
total() {
let result:any = this.arr.reduce((prev: number, next: number) => {
return prev + next;
}, 0);
return result;
}
}
});
export default useInfoStore;
|
子组件引入并调用组件方法
1
2
3
4
5
6
7
8
9
10
11
12
13
14
15
16
17
18
19
20
21
22
23
24
25
26
| <template>
<div class="child">
<h1>{{ infoStore.count }}---{{infoStore.total}}</h1>
<button @click="updateCount">点击我修改仓库数据</button>
</div>
</template>
<script setup lang="ts">
import useInfoStore from "../../store/modules/info";
let infoStore = useInfoStore();
console.log(infoStore);
const updateCount = () => {
infoStore.updateNum(66,77);
};
</script>
<style scoped>
.child {
width: 200px;
height: 200px;
background: yellowgreen;
}
</style>
|
组合式API写法
src/store/modules/todo.ts
1
2
3
4
5
6
7
8
9
10
11
12
13
14
15
16
17
18
19
20
21
22
23
24
25
|
import { defineStore } from "pinia";
import { ref, computed,watch} from 'vue';
let useTodoStore = defineStore('todo', () => {
let todos = ref([{ id: 1, title: '吃饭' }, { id: 2, title: '睡觉' }, { id: 3, title: '打豆豆' }]);
let arr = ref([1,2,3,4,5]);
const total = computed(() => {
return arr.value.reduce((prev, next) => {
return prev + next;
}, 0)
})
return {
todos,
arr,
total,
updateTodo() {
todos.value.push({ id: 4, title: '组合式API方法' });
}
}
});
export default useTodoStore;
|
子组件引入并调用组件方法
1
2
3
4
5
6
7
8
9
10
11
12
13
14
15
16
17
18
19
20
21
22
23
24
25
26
27
28
29
| <template>
<div class="child1">
{{ infoStore.count }}
<p @click="updateTodo">{{ todoStore.arr }}{{todoStore.total}}</p>
</div>
</template>
<script setup lang="ts">
import useInfoStore from "../../store/modules/info";
let infoStore = useInfoStore();
import useTodoStore from "../../store/modules/todo";
let todoStore = useTodoStore();
const updateTodo = () => {
todoStore.updateTodo();
};
</script>
<style scoped>
.child1 {
width: 200px;
height: 200px;
background: hotpink;
}
</style>
|
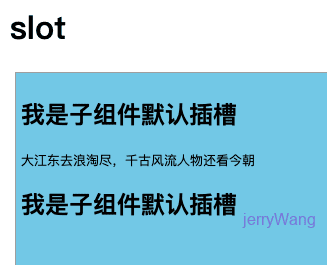
slot
插槽:默认插槽、具名插槽、作用域插槽可以实现父子组件通信.
默认插槽:
父组件
在父组件内部提供结构:Test即为子组件,在父组件内部使用的时候,在双标签内部书写结构传递给子组件
注意开发项目的时候默认插槽一般只有一个
1
2
3
4
5
6
7
8
9
10
11
12
13
14
15
16
17
18
| <template>
<div>
<h1>slot</h1>
<Test>
<div>
<pre>大江东去浪淘尽,千古风流人物还看今朝</pre>
</div>
</Test>
</div>
</template>
<script setup lang="ts">
import Test from "./Test.vue";
</script>
<style scoped>
</style>
|
子组件./Test.vue
在子组件内部的模板中书写slot全局组件标签
1
2
3
4
5
6
7
8
9
10
11
12
13
14
15
16
17
18
19
20
21
| <template>
<div class="box">
<h2>我是子组件默认插槽</h2>
<slot></slot>
<h2>我是子组件默认插槽</h2>
</div>
</template>
<script setup lang="ts">
</script>
<style scoped>
.box{
width: 100vw;
height: 400px;
background: skyblue;
}
</style>
|
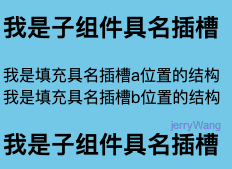
具名插槽:
父组件内部向指定的具名插槽传递结构。需要注意v-slot:可以替换为#
1
2
3
4
5
6
7
8
9
| <Test>
<template v-slot:a> //可以用#a替换
<div>我是填充具名插槽a位置的结构</div>
</template>
<template #b>
<div>我是填充具名插槽b位置的结构</div>
</template>
</Test>
|
顾名思义,此插槽带有名字在组件内部留多个指定名字的插槽。
下面是一个子组件内部,模板中留两个插槽
1
2
3
4
5
|
<h2>我是子组件具名插槽</h2>
<slot name="a"></slot>
<slot name="b"></slot>
<h2>我是子组件具名插槽</h2>
|
作用域插槽:
作用域插槽:可以理解为,子组件数据由父组件提供,但是子组件内部决定不了自身结构与外观(样式)
1
2
3
4
5
6
7
8
9
10
11
12
13
14
15
16
17
18
19
20
21
22
23
24
25
26
27
28
29
30
31
| <template>
<div>
<h1>slot</h1>
<Test1 :todos="todos">
<template v-slot="{ $row, $index }">
<p :style="{ color: $row.done ? 'green' : 'red' }">
{{ $row.title }}--{{ $index }}
</p>
</template>
</Test1>
</div>
</template>
<script setup lang="ts">
import Test1 from "./Test1.vue";
import { ref } from "vue";
let todos = ref([
{ id: 1, title: "吃饭", done: true },
{ id: 2, title: "睡觉", done: false },
{ id: 3, title: "打豆豆", done: true },
{ id: 4, title: "打游戏", done: false },
]);
</script>
<style scoped>
</style>
|
子组件./Test1.vue
1
2
3
4
5
6
7
8
9
10
11
12
13
14
15
16
17
18
19
20
21
22
23
24
| <template>
<div class="box">
<h1>作用域插槽</h1>
<ul>
<li v-for="(item, index) in todos" :key="item.id">
<slot :$row="item" :$index="index"></slot>
</li>
</ul>
</div>
</template>
<script setup lang="ts">
defineProps(["todos"]);
</script>
<style scoped>
.box {
width: 100vw;
height: 400px;
background: skyblue;
}
</style>
|