Mac Iterm2神器

Mac Iterm2神器
墨颜丶mac 目前最好用的终端神器没有之一

安装iTerm2
下载地址:https://www.iterm2.com/downlo…
也可以通过Homebrew来安装
1 | $ brew cask install iterm2 |
配置
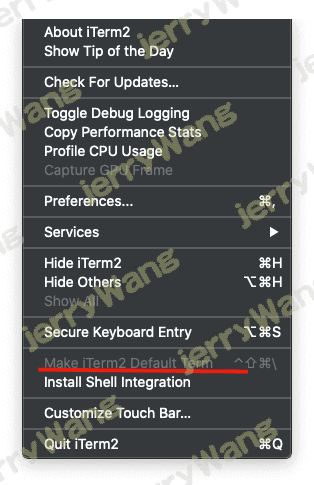
配置ITerm为默认终端
配置iTerm2主题
最新版的ITerm2 默认Solarized Dark 可以直接选择
iTerm2 最常用的主题是 Solarized Dark theme
下载地址:http://ethanschoonover.com/so…
下载的是压缩文件,解压后,打开iTerm2,按Command+,键,打开Preferences配置页面,然后Profiles -> Colors -> Color
Presets -> Import,选择刚解压的压缩文件solarized->iterm2-colors-solarized->Solarized Dark.itermcolors文件,导
入成功,最后选择Solarized Dark 主题,就可以了。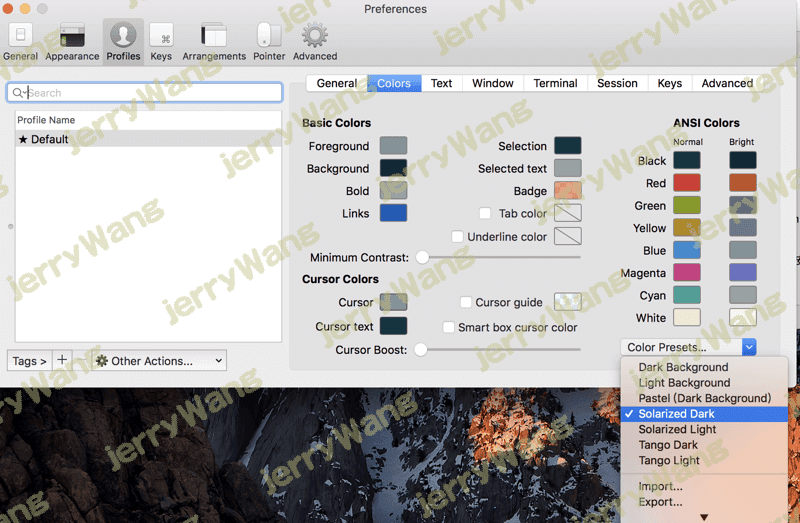
配置 Oh My Zsh
Oh My Zsh 是对主题的进一步扩展,地址:https://github.com/robbyrusse…
一键安装:
1 | sh -c "$(curl -fsSL https://raw.githubusercontent.com/ohmyzsh/ohmyzsh/master/tools/install.sh)" |
安装好之后,需要把 Zsh 设置为当前用户的默认 Shell(这样新建标签的时候才会使用 Zsh):
1 | $ chsh -s /bin/zsh |
然后,我们编辑vim ~/.zshrc文件,将主题配置修改为ZSH_THEME="agnoster"
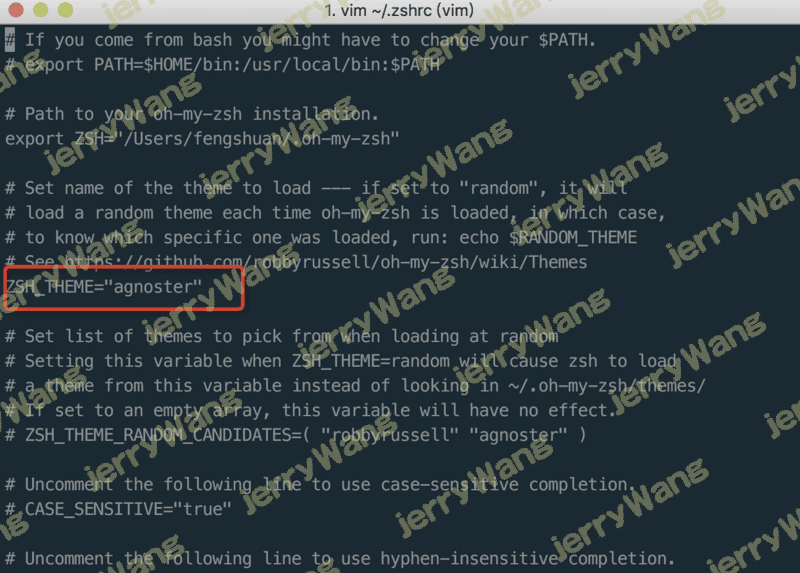
agnoster是比较常用的 zsh 主题之一,你可以挑选你喜欢的主题,zsh 主题列表:https://github.com/robbyrusse…
配置后,效果如下:

配置 Meslo 字体
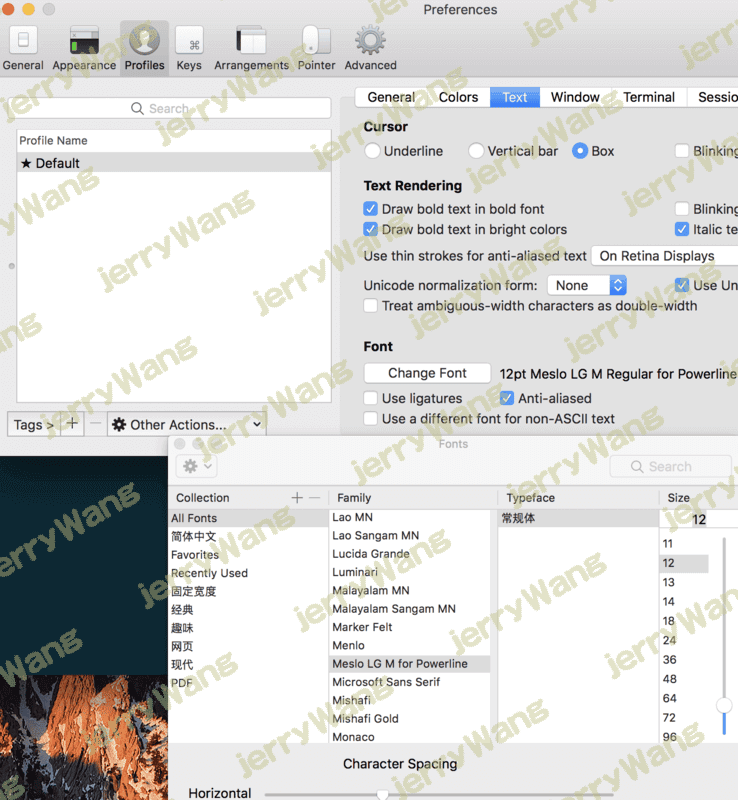
使用上面的主题,需要 Meslo 字体支持,要不然会出现乱码的情况,字体下载地址:Meslo LG M Regular for Powerline.ttf
1 | wget https://raw.githubusercontent.com/powerline/fonts/master/Meslo%20Slashed/Meslo%20LG%20M%20Regular%20for%20Powerline.ttf |

下载好之后,直接在 Mac OS 中安装即可。
然后打开 iTerm2,按Command + ,键,打开 Preferences 配置界面,然后Profiles -> Text -> Font -> Chanage Font,选择
Meslo LG M Regular for Powerline 字体
自动提示填充
这个功能非常的实用,可以提高我们的开发效率
先克隆zsh-autosuggestions项目,到指定目录:
1 | $ git clone https://github.com/zsh-users/zsh-autosuggestions ~/.oh-my-zsh/custom/plugins/zsh-autosuggestions |
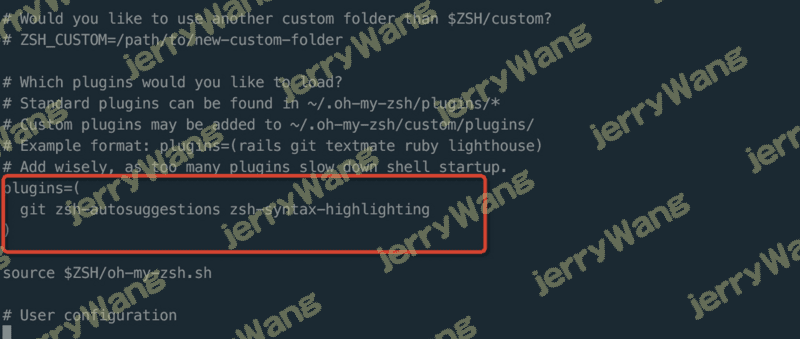
然后编辑vim ~/.zshrc文件,找到plugins配置,增加zsh-autosuggestions插件。
语法高亮
- 使用homebrew安装zsh-syntax-highlighting 插件。
git clone https://github.com/zsh-users/zsh-syntax-highlighting.git ${ZSH_CUSTOM:-~/.oh-my-zsh/custom}/plugins/zsh-syntax-highlighting
- vim ~/.zshrc配置文件,插入一行,保存退出。
plugins=( … zsh-syntax-highlighting)
- 输入命令。
source ~/.zshrc
PS:安装homebrew包管理工具:
/usr/bin/ruby -e “$(curl -fsSL https://raw.githubusercontent.com/Homebrew/install/master/install)”
给ITerm中Vim配色
Vim 的配色最好和终端的配色保持一致,不然在 Terminal/iTerm2 里使用命令行 Vim 会很别扭。
首先下载solarized(上述已经下载过了,进入下载解压后的目录),上文有下载方法和地址。执行以下命令
$ cd solarized
$ cd vim-colors-solarized/colors
$ mkdir -p ~/.vim/colors
$ cp solarized.vim ~/.vim/colors/
$ vi ~/.vimrc
加入下面三行设置即可
syntax enable
set background=dark
colorscheme solarized
给ITerm2中ls配色
1.下载安装 coreutils
brew install coreutils
2.创建颜色配置文件
gdircolors --print-database > ~/.dir_colors
3.启用颜色配置文件
sudo vim ~/.zshrc
添加如下即可----忽略以下
#####if brew list | grep coreutils > /dev/null ; then PATH=“$(brew --prefix coreutils)/libexec/gnubin:$PATH” alias ls=‘ls -F --show-control-chars --color=auto’ eval
gdircolors -b $HOME/.dir_colorsfi
最后,希望本文对这方面需求的小伙伴,启到帮助的作用!
可用到的参考链接:
Mac下终端配置(item2 + oh-my-zsh + solarized配色方案)
mac 终端 使用 gnu coreutils 工具 ls 颜色显示
iTerm2 快捷命令
| 命令 | 说明 |
|---|---|
| command + t | 新建标签 |
| command + w | 关闭标签 |
| command + 数字 command + 左右方向键 | 切换标签 |
| command + enter | 切换全屏 |
| command + f | 查找 |
| command + d | 垂直分屏 |
| command + shift + d | 水平分屏 |
| command + option + 方向键 command + [ 或 command + ] | 切换屏幕 |
| command + ; | 查看历史命令 |
| command + shift + h | 查看剪贴板历史 |
| ctrl + u | 清除当前行 |
| ctrl + l | 清屏 |
| ctrl + a | 到行首 |
| ctrl + e | 到行尾 |
| ctrl + f/b | 前进后退 |
| ctrl + p | 上一条命令 |
| ctrl + r | 搜索命令历史 |
快捷登陆服务器
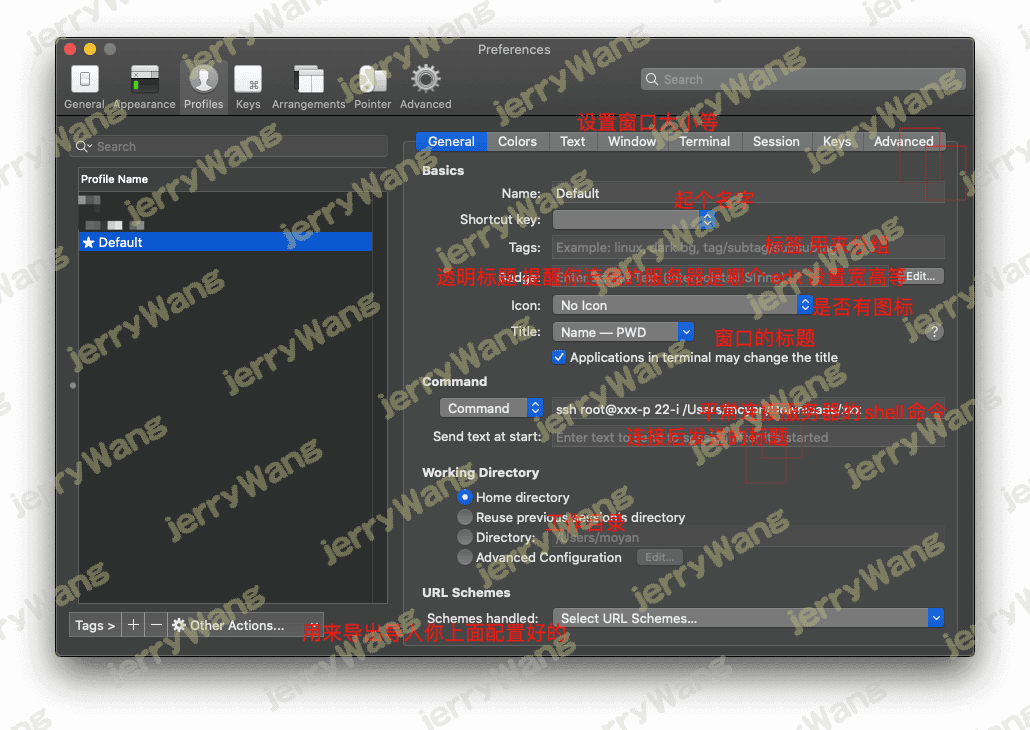
点击这个或者配置快捷键快速连接

最后不想一点击Iterm2就登陆到服务器上,之前默认的不要动还继续默认就行了
带星星的Profile Name就是默认的,修改回最初的配置.
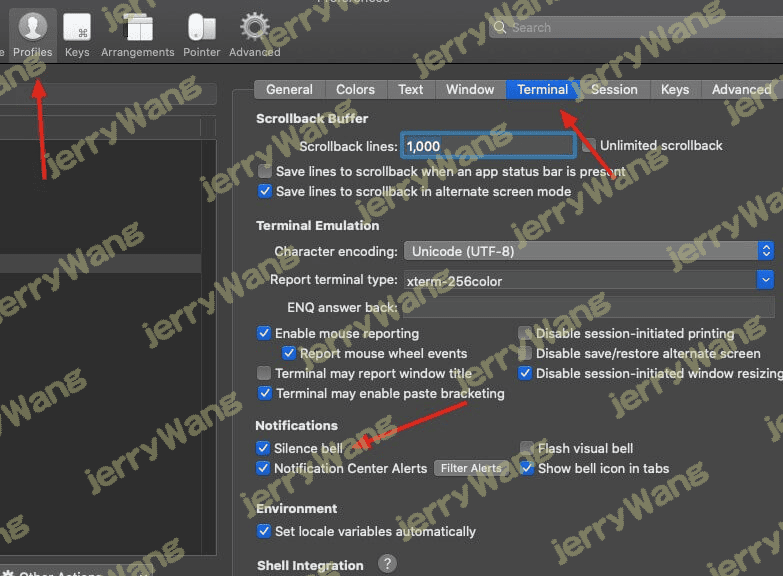
Iterm2关闭警告声音
选中Preferences -> Profiles -> Terminal -> silence bell
[oh-my-zsh]异常提示
1 | [oh-my-zsh] Insecure completion-dependent directories detected: |
解决方法
1 | vi .zshrc |
公平地讲,zsh-user
对于每个插件都有正确的安装说明,具体取决于操作系统…
- https://github.com/zsh-users/zsh-syntax-highlighting - install.md
- https://github.com/zsh-users/zsh-completions - readme.md
- https://github.com/zsh-users/zsh-autosuggestions - install.md
- https://github.com/zsh-users/zsh-history-substring-search - readme.md